Foundation vents are meant to keep your home properly aerated, but the truth is that the crawl space beneath your home is prone to energy loss, moisture damage, and pests. Improper ventilation can cost you hundreds each year in lost energy, whether it’s letting too much heat out of your home in the winter to forcing your AC to work overtime in the hotter months.
Many homes come equipped with styrofoam crawl space vent covers, but these kinds of covers have a lot of problems of their own. They’re environmentally unsafe, contributing to landfills and a growing litter problem. Polystyrene doesn’t break down for a long time, is composed of harmful chemicals, and causes untold damage to ecosystems the world over. Unfortunately, that isn’t even the worst of it: as foundation vent covers, they fail to make up for all these drawbacks because they are ugly, harm your home’s curb appeal, and are ineffective. All in all, styrofoam fails to properly insulate your vents or protect them from pests, making them poor options for crawl space vent covers.
As a better option, Vanity Vents are durable, better-looking, and safe for the environment. Many people ask us how to install foundation vents, and the good news is that it’s a simple process. Installation is straightforward and requires no specialized tools or knowledge. Simply follow the guidelines below and you will be able to enjoy your new Vanity foundation vent covers in a matter of minutes.
Proper care and maintenance after installation are likewise important, and equally easy! This article discusses how to properly install and maintain your Vanity Vents, and why they are such a good solution for your foundation vents.
Why Vanity Make More Sense
Vanity Vents are better than styrofoam for a variety of reasons: They come in multiple colors to fit any home exterior, they’re made of durable, environmentally friendly materials, and they’re designed and constructed in the United States. We proudly ship our products across the country, and stand by their quality with a 100% satisfaction guarantee.
Vanity Vents, with their superior seal, can help you save money on your energy bill. You’ll lose less heat in the winter, keeping your home warmer and requiring less thermostat adjustment, while in the summer, you can keep your house cooler and run the AC less.
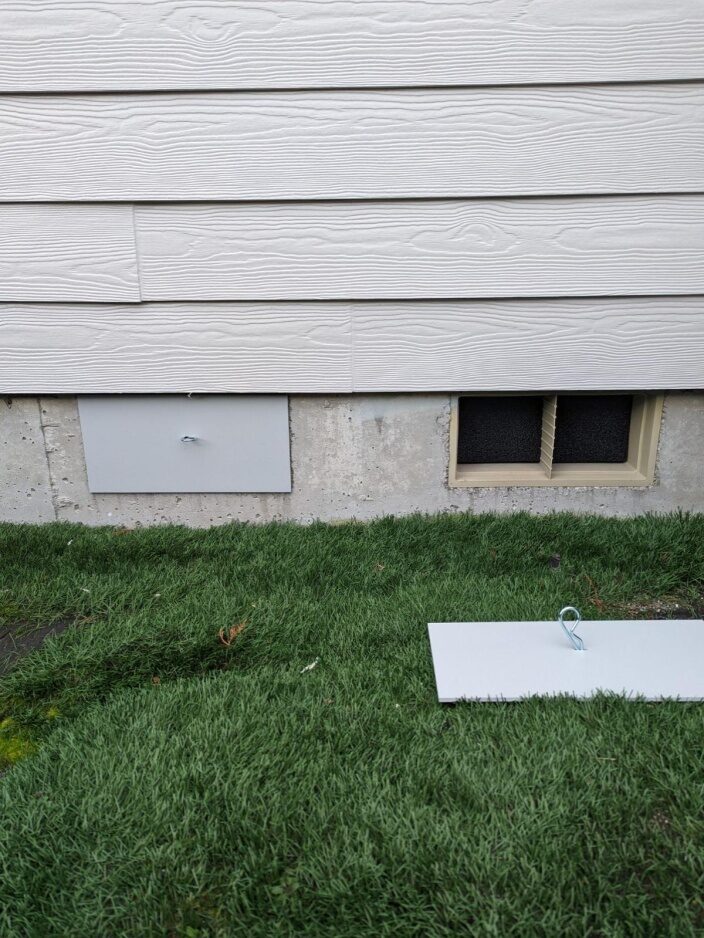
Your home’s curb appeal is a major part of its value, and unsightly styrofoam vent covers become dirty, damaged, and stick out like eyesores, ruining your home’s exterior aesthetic appeal. Vanity Vents can be matched to your exterior colors and fit flush with your vents, creating a smooth, sleek, uniform look that only enhances your home’s appearance.
All of these factors make Vanity Vents the superior choice for your vent cover needs. Read on to find out how to install your foundation vents
How to Install Your Vent Covers
Installing your new Vanity Vents is a painless process. First, we begin by selecting the color that most closely matches your home’s exterior colors. Even if none of these vibrant colors match your home exactly, chances are that one of them will compliment your exterior colors, and they’re easy to repaint if needed.
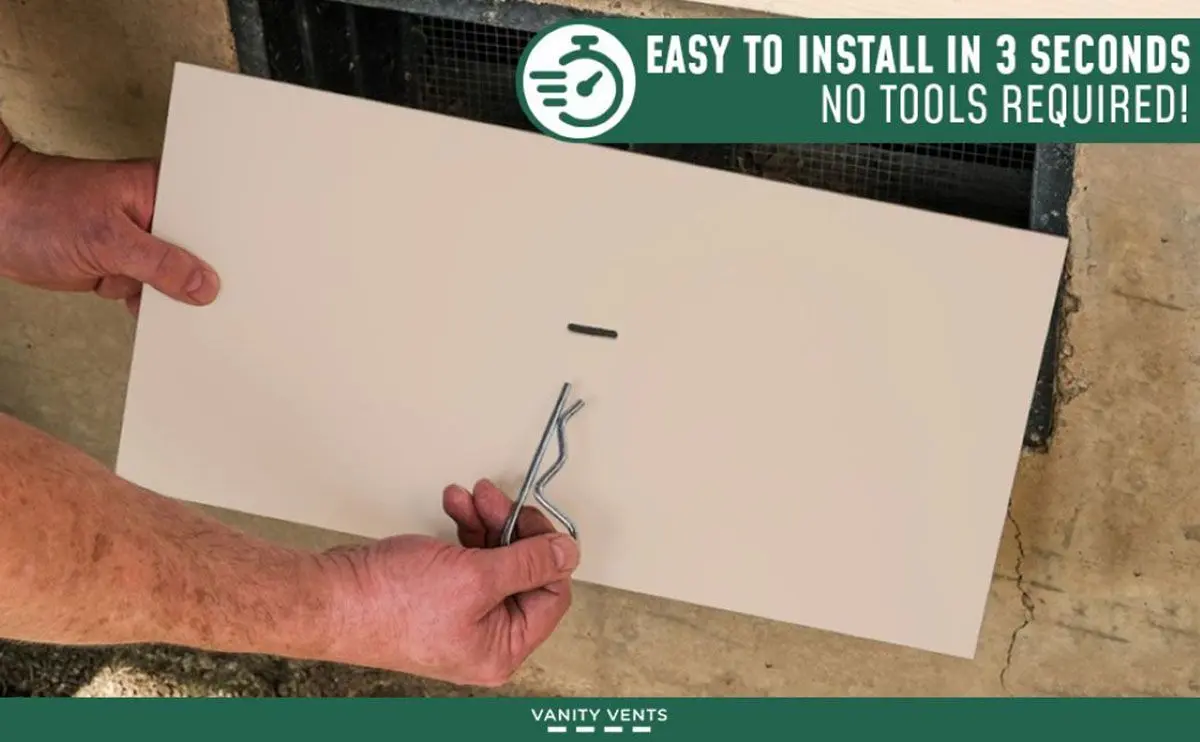
In most cases, you will be able to install your Vanity Vents as they were shipped. As long as your foundation vents feature that vertical strip in the middle for the Vanity Vent clip to attach to, you will be able to quickly and easily install your cover. Simply insert the clip through the matching hole in the Vanity Vent cover and then use it to help guide the vent cover into place. The clip will attach to the vertical panel inside the vent, and with it you can push the vent cover firmly into place.
This process will be enough for the majority of cases. Even if your Vanity Vents don’t lie perfectly flush against the house’s exterior, you will likely still have a snug fit that provides the complete benefits of the cover. If absolutely necessary, you can gently chip away concrete and other exterior protrusions, making sure to use all appropriate safety gear and precautions.
Similarly, if the Vanity Vents do not fit, they can be resized. This will require a standard power saw, and we encourage you to measure thoroughly before cutting. Even in cases where the Vanity Vents are larger than your actual vents, the covers may still fit and provide a firm seal as long as you are able to clip them to the vertical panel; resizing may not even be necessary in this case.
Maintaining Your Vent Covers
Once installed, maintaining your vent covers becomes a matter of keeping them clean and checking to make sure that they are snugly attached. The covers don’t accumulate and show dirt the same way that styrofoam vent covers do, but occasionally they may need washing. Simply spray them with a hose and wipe them down with a towel or handy rag.
In the case of more difficult stains, such as oil, grease, and similar, you may use stiff brushes and nylon scrub pads, as well as using gentle exterior cleaners. It is possible to use stronger chemicals such as bleach, but exercise due precautions in handling these materials.
Check the vent covers for a snug fit and to make sure that the seal hasn’t been compromised by exterior forces. Pests like rodents and insects can’t harm your Vanity Vents, and they won’t warp or break in changing weather conditions, but sometimes things can happen. It’s always best to give them a thorough cleaning and examination as the seasons change.
Vanity Vents: Easy, Affordable, Durable
Vanity Vents will save you money, and can actually help increase the value of your home by adding to the curb appeal. They’ll help prevent musty mildew buildup and frozen pipes in the colder, moister months, and regulate heat in the summer to keep your family cool.
With all these advantages, plus an affordable price tag, it’s easy to see why Vanity Vents are a great choice to install in your foundation crawl spaces! If you have any questions, contact us or check out our FAQ page today!


